This is a two part series for propagating azaleas by cuttings. When I first tried my hand at taking azalea cuttings I failed miserably, not one cutting took. It took me about 3yrs of trial and error to figure out what worked and what didn’t. I finally came up with a method that produces a very high percentage of rooted cuttings that is a basically set up and forget. Part one will explain when to take azalea cuttings. While there’s plenty of tried and true ways of getting azalea cuttings to root. I feel my method is fairly simple in that anyone can do it with no propagating experience yet still get a very high rate of rooted cuttings.
First and foremost the key to successful rooting is patience. You have to wait for the window to open to take your cuttings. Taking them to early or late could mean failure. Taking them at the right time could reward you with a bunch of new azaleas. Azaleas overall are fairly easy to propagate as they respond well to air layering, ground layering, grafting, or cuttings. But the percentage rate may not be as high as you would like.
How do you know when your window opens? Well you have to know when to take the cuttings. Kurume blooded azaleas typically bloom first, and then start their flush of growth. While satsuki blooded azaleas have a bit of growth first, bloom, and then finish off their flush of growth. Kurume’s are the early bloomers while satsuki’s are the late bloomers. Keep in mind that this is a generality. Azaleas have been hybridize where both bloods have been mixed giving you a wide range of bloom times. But for both bloods it is the current years flush of growth that will give you the best percentage rate of rooted cuttings.
Each azalea cultivar has their own respective window. Bloom time is your first indicator to determine that window. The window could be early or it could be late. Typically (I say this loosely) windows start to open about a month after the flowers drop. But to be sure when the time is right is to check the flush of growth. Some branches have more vigor than others on the same plant so inspecting will provide a better insight on whether to take the cuttings or not.
The below set of pictures will help you to understand when to take your cuttings.
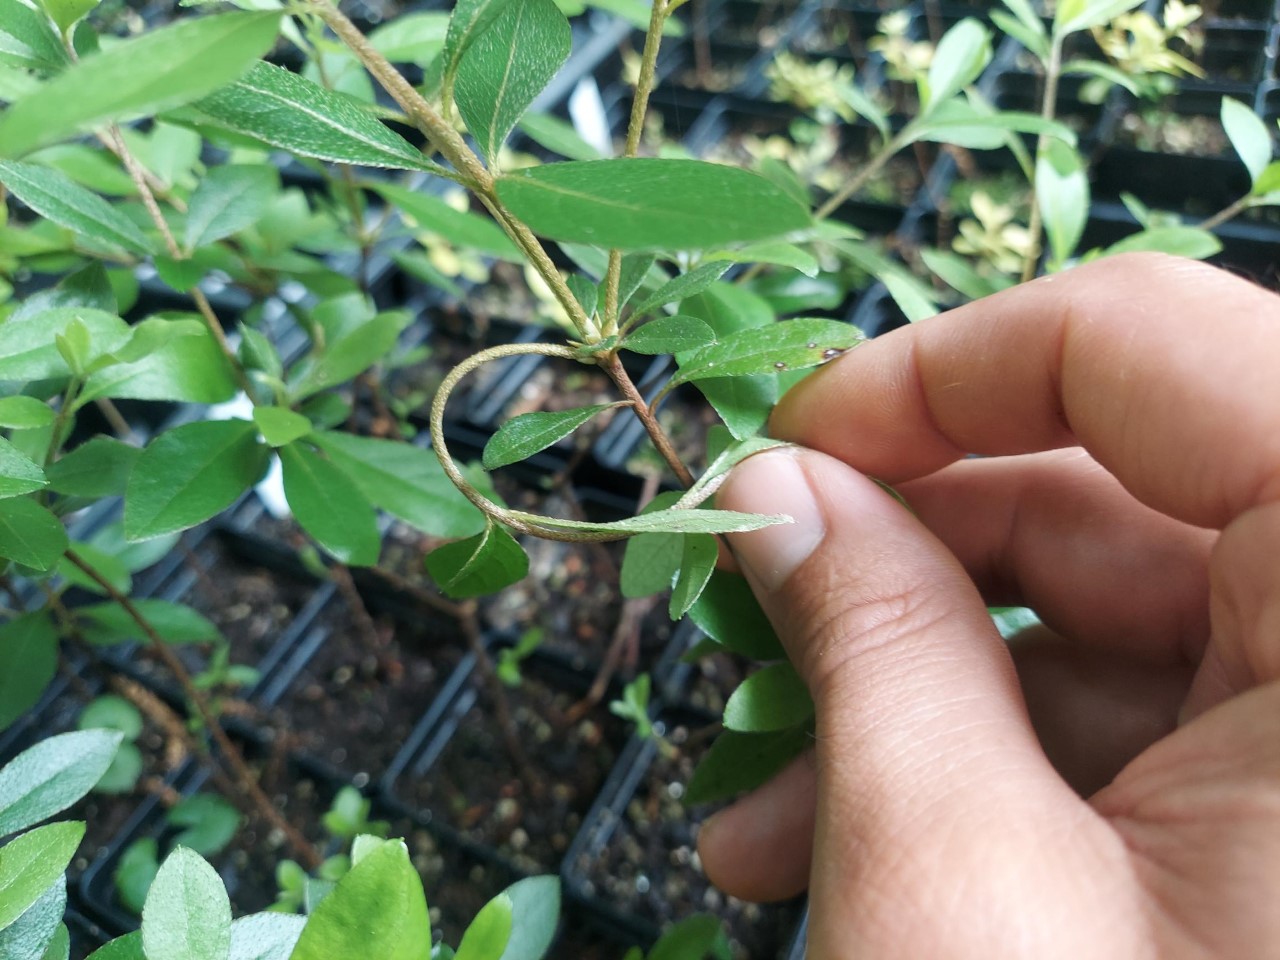
Picture #1 – This stem is extremely flexible. Without the use of a controlled environment and an automated mister taking these as cuttings will most likely fail.

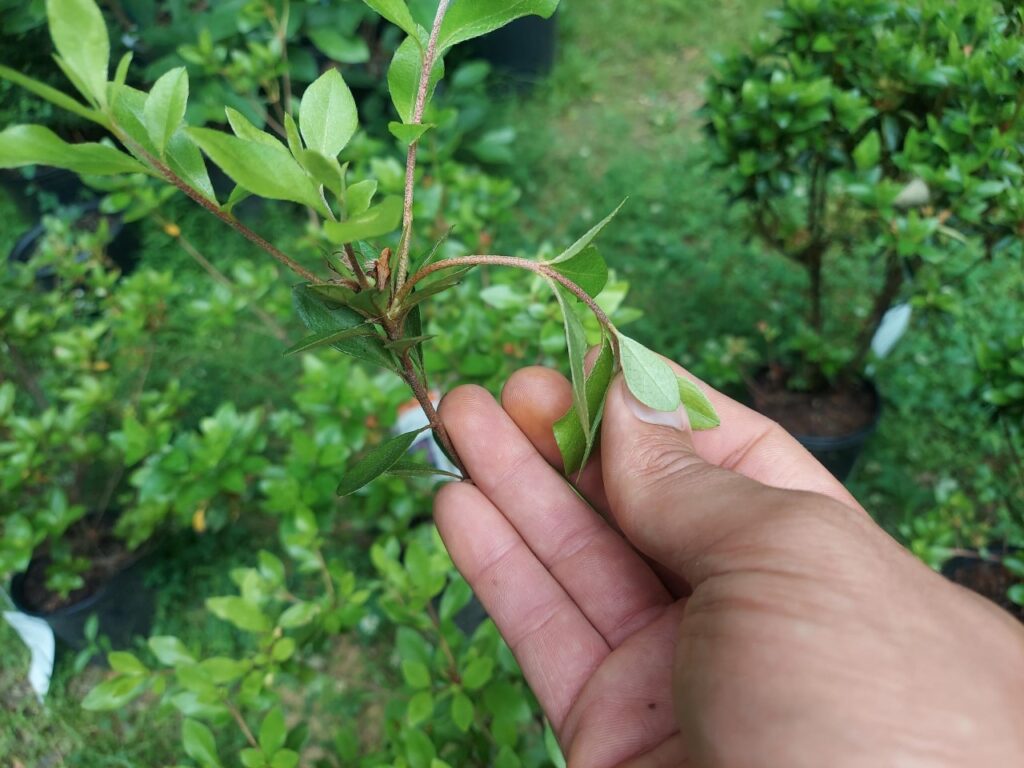
Picture #2 – The stem is beginning to harden off. It is still flexible, but not as flexible as in Picture #1. Bending the stem any further will most likely put a crease in the stem. Taking cuttings at this stage would still require the same set up as cuttings in Picture #1.
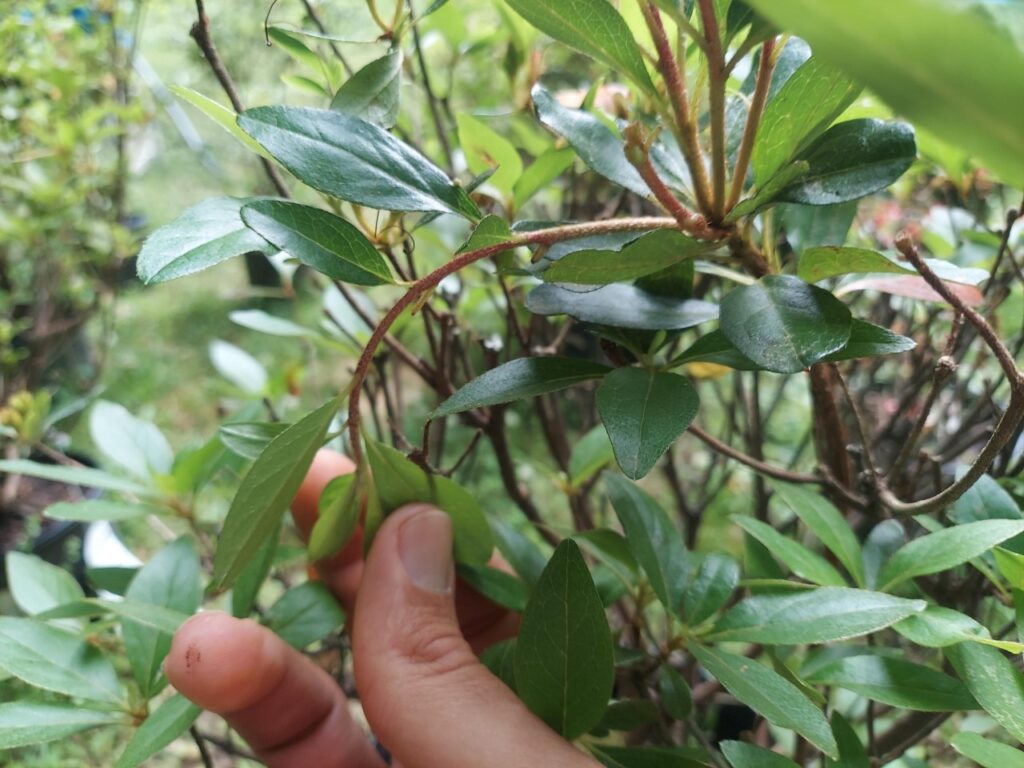
Picture #3 – This stem has harden off. Only the tip where the leaves are is flexible. The stem actually resists being bent. Continuing to bend this stem will result in the stem snapping. It is at this point you want to take your cuttings. You will have the most success using cuttings at this stage using my method.
In part two, I will explain how to set up your cuttings for the set up and forget method.
Good information, looking forward to Part 2!
Thanks! I should have Part 2 posted in a couple days.